
Fluffy Idlis Using Idli Rava | How to Make Great Idlis Using a Mixer
Thursday, May 14, 2020
When I posted the recipe for Brahmin's Cafe Chutney, I got a lot of requests to share my Idli Recipe. So, I thought I needed to do a detailed post on how to make Karnataka Style Idlis
I don't have a grinder at home, I use my Preethi Eco Plus Mixer to grind my Idli & Dosa Batter. And I must say that it turns out very good even though its ground in a Mixie. So, the point is that you don't necessarily need a grinder to make great Idlis. You can make great Idlis using a Mixie too

Before we proceed to make Idlis, Let's get some basics right
How are Karnataka Style Idlis Different?
Common amongst most Kannada households & Darshinis across Karnataka, These Idlis are crumbly in texture & made using Idli Rava.
The batter is slightly coarse in texture.
Methi Seeds are NOT added in the Batter.
Since the batter is slightly coarse in texture, It cannot be used to make Dosas
What is Idli Rava?

Idli Rava or Rice Rava also known as Idli Tari in Kannada, is coarsely ground Par Boiled Rice. The coarsely ground texture resembles Rava. Hence, the name Idli Rava.
Can I substitute Gota Urad dal with Split Urad Dal?
Yes you can substitute one for another but from my experience, Gota Urad Dal yields fluffier Idlis.
Why is Sabudana added?
Adding Sabudana is completely optional. But it helps in making the Idlis softer, especially if you are using a Mixie to grind the batter.
You can skip it entirely, if you are going to grind the batter in a Grinder

Ingredients:
Makes 30-34 Idlis
- 3 parts Idli Rava/Idli Tari (300 Grams)
- 1 part Whole Urad Dal (110 Grams)
- 1 part Thick Poha (60 Grams)
- 2 tablespoon Sabudana
- Salt
- Water to Soak & Grind
Method:
In a wide bowl, measure out 3 parts of Idli Rava & soak it in water cover just 1 inch above the surface
In another wide bowl, measure out Urad Dal, Poha & Sabudana & clean in several changes of water until it runs clear of starch. Soak in plenty of water
Soak them for a minimum of 6 hours. I usually soak for 8 hours or overnight. Set Aside
In a mixer/grinder, Add small batches of the Urad Dal/Poha/Sabudana mixture.Add little water & grind to a smooth paste.
Squeeze out all the water from the Idli Rava, handfuls at a time & add it to this ground paste & mix well with you hands.
You may want a grainy Idli texture, but still the Idli Rava should be well incorporated with the Urad Dal mixture, so you need to grind this mixture again.
Take small batches of this mixture into your mixer/grinder & grind them into a slightly coarse paste. You should not grind it too much & make it into a smooth paste. Pour it into a container, large enough to accommodate the fermented batter without spilling.
When you are done with all the grinding, Add salt & Mix well with your hands for a minute.
This step is important as the heat from our hands is said to aid the fermentation.
Set it aside in a warm place in your kitchen to ferment for at least 8-12 hours
By the end of 8-12 hours, the batter would have risen quite well.
To Make Idlis
Gently mix the fermented batter with a ladle. Do Not do this rigorously. Check for salt & add more if needed
Grease the Idli plates
Pour the idli batter into the idli plates. Fill the Idli Pot with 1/4 cup of water. Place the idli plates inside the steamer &steam for 8 minutes.
After 8 minutes, turn off the stove. Let it rest for 4-5 minutes. Unmould with the help of a spoon.
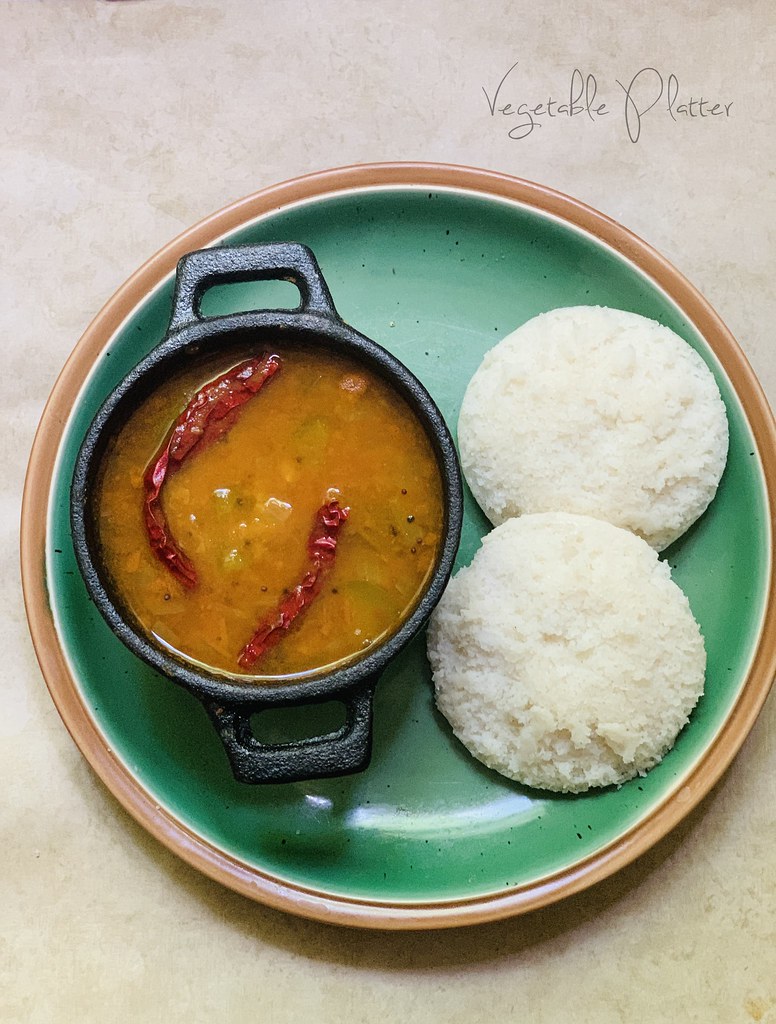
Serve Hot Hot Idlies with Chutney/Sambhar/Chutney Pudi
NOTES & OTHER MISCELLANEOUS INFORMATION
You can ferment that batter in the Instant Pot. Turn the 'Low' Yogurt mode On & let it ferment overnight
How to Ferment in Colder Months?
You can ferment that batter in the Instant Pot. Turn the 'Low' Yogurt mode On & let it ferment overnight
OR
Preheat the Oven to 350 F. Turn off the oven & place the container inside the oven with lights On
OR
I just place the container on the kitchen counter, close to the stovetop. The surrounding usually stays warm due to the heat from all the cooking done on the stovetop. This works for me, even during winters.
A Sample Schedule for Colder Months
I live in a place that is pretty cold for almost 8 months in a year. So, the batter needs longer periods of fermentation. I have written 2 sample schedules that I use in colder months so that you can get an idea of how long to soak & when to grind
OR
Soak at night before going to bed around 11 PM. Grind the batter between 7 AM - 9 AM & your batter will be ready be late evening, if you want to have them for dinner Tips for Grinding in a Mixie
Unlike Grinder, A mixie heats up the batter a little & sometimes this hampers fermentation. You can do 2 things to counter the heating up of the batter
Use Cold water from the fridge to grind the batter
OR
You can keep the soaked ingredients in the fridge for a hour or two before you start grinding. This trick works like a charm, believe me


0 comments